A ginger bug recipe is where I always send folks who want to make their own fizzy, probiotic-rich drinks at home. I started mine after losing my job and spending more time in the kitchen, trying to recreate the simple, old-world flavors I grew up with. Back then, my granddad would always have a mason jar of something bubbling on the windowsill. One summer, he handed me a spoonful of what he called “starter soda”, it was sharp, slightly sweet, and full of life. That was my first taste of a ginger bug recipe.
This easy mix of fresh ginger, sugar, and water builds a natural culture of wild yeast and bacteria that brings homemade soda to life. You’ll see bubbles, smell the funk, and feel proud you made it yourself. In this article, I’ll walk you through how to make a ginger bug recipe from scratch, how to feed and maintain it, and what delicious things you can brew with it later.

So if you’re curious about fermentation but don’t want to buy fancy ingredients or equipment, this ginger bug recipe is the place to start.
Table of Contents
Making Your First Ginger Bug Recipe
Why a Ginger Bug Recipe Is the Best Way to Start Fermenting
A ginger bug recipe is one of the easiest and most satisfying ways to dive into home fermentation. If you’ve never tried fermenting anything before, this is where to start. There’s no fancy equipment, no hard to find ingredients, just ginger, sugar, and water. You’re building a natural culture that will add fizz and probiotics to your homemade drinks.
This starter works by capturing wild yeast and bacteria from the air and the ginger’s skin. When fed daily with sugar, the culture becomes active and bubbly. After five to seven days, it turns into a natural fermenting agent that you can use to make soda, ginger beer, and other probiotic beverages.
I like it because it’s simple and forgiving. You don’t need a SCOBY or special jars. If you’ve ever made something like lemon balm tea or a turmeric drink for weight loss, this will feel just as hands-on but more exciting, you’re working with something alive.
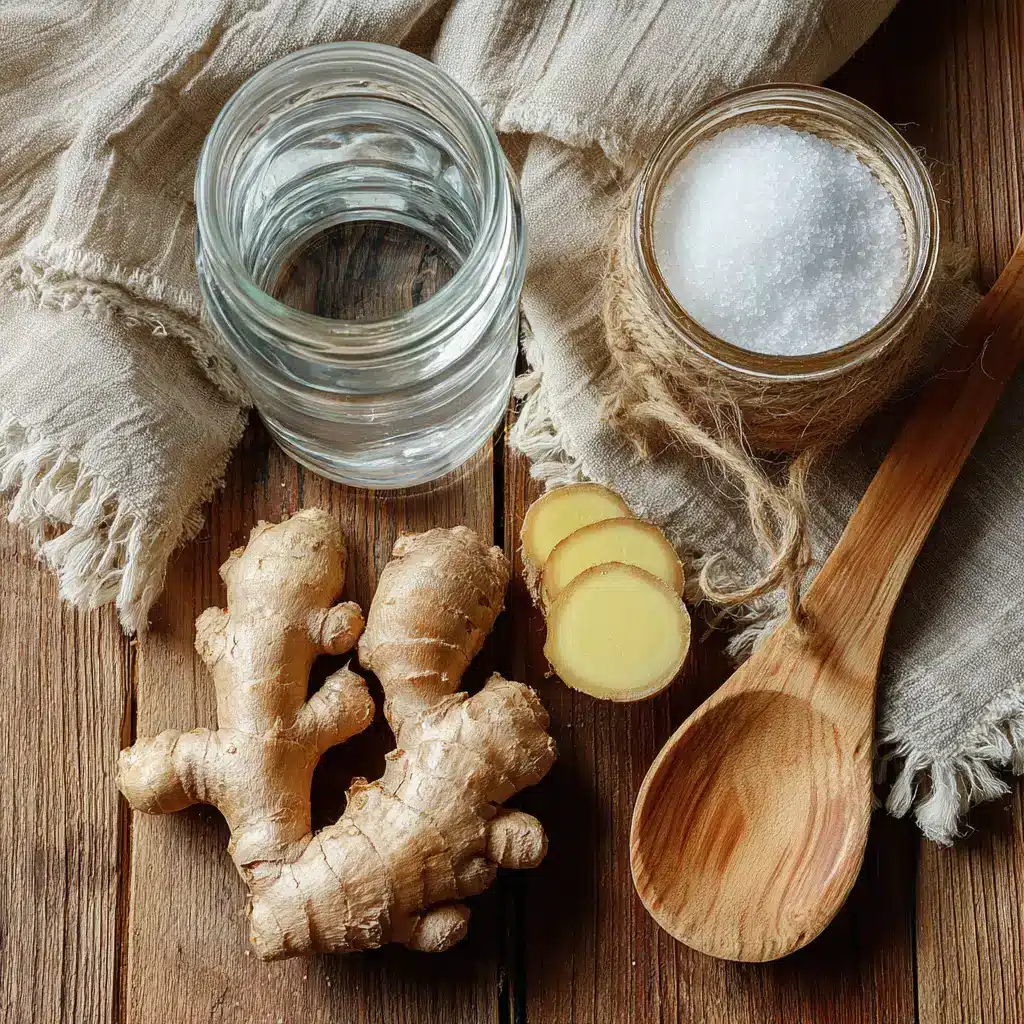
Ingredients and Tools for Your Ginger Bug Recipe
To get started, gather the following:
- Fresh ginger (unpeeled)
- White sugar (avoid substitutes or honey)
- Filtered or dechlorinated water
- A clean glass jar (1-quart size works great)
- A breathable cover (cheesecloth or a paper towel and rubber band)
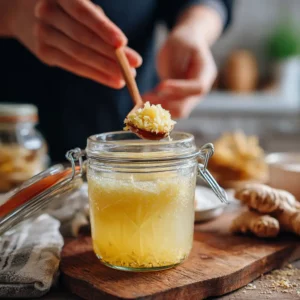
On Day 1, combine 2 tablespoons of grated ginger and 2 tablespoons of sugar in the jar with about 2 cups of water. Stir it up, cover it with your cloth, and let it sit at room temperature.
From Day 2 onward, you’ll feed it daily: add 1 tablespoon grated ginger and 1 tablespoon sugar. Stir once or twice each day. Within five to seven days, you should notice bubbles and a slightly tangy, yeasty smell. That’s a sign your ginger bug is active.
When it bubbles shortly after stirring, it’s ready to use. This ginger bug is your homemade fermentation booster. You can use it to kickstart natural sodas or ginger beer, or even add sparkle to infused tonics like apple cider vinegar drinks or a fruit-forward brew like strawberry matcha latte.
This ginger bug recipe takes just a few minutes a day, but the results are worth it. Once you see that fizz, you’ll want to keep a jar going all year long.
Print
Ginger Bug Recipe: Easy Homemade Starter for Fermented Drinks
Learn how to make a ginger bug recipe from scratch using just ginger, sugar, and water. This homemade fermenting starter is perfect for natural sodas and probiotic drinks.
- Total Time: 5-7 days
- Yield: 1 starter jar 1x
Ingredients
2 cups filtered water
2 tbsp fresh grated ginger (unpeeled)
2 tbsp white sugar
Additional 1 tbsp ginger and sugar for daily feedings
Instructions
1. Combine ginger, sugar, and water in a clean glass jar.
2. Cover with breathable cloth and secure with rubber band.
3. Place at room temperature, away from direct sunlight.
4. Each day, add 1 tbsp grated ginger and 1 tbsp sugar.
5. Stir well with a clean spoon.
6. After 5–7 days, look for bubbles and a yeasty smell.
7. Strain liquid and use for fermenting homemade sodas.

Notes
Use organic ginger if possible.
Do not use honey or artificial sweeteners.
Always use chlorine-free water.
- Prep Time: 10 minutes
- Cook Time: 0 minutes
- Category: Fermentation
- Method: No-cook
- Cuisine: Traditional
- Diet: Vegan
Nutrition
- Serving Size: 1 tbsp
- Calories: 30
- Sugar: 5g
- Sodium: 0mg
- Fat: 0g
- Saturated Fat: 0g
- Unsaturated Fat: 0g
- Trans Fat: 0g
- Carbohydrates: 7g
- Fiber: 0g
- Protein: 0g
- Cholesterol: 0mg
Using and Maintaining Your Ginger Bug Recipe
How to Use a Ginger Bug Recipe for Homemade Drinks
Once your ginger bug recipe is active and bubbling, it’s ready to be used as a natural fermenting agent. This fizzy starter can bring life to homemade sodas, ginger beer, herbal tonics, and fruit-based drinks. The best part? You control the flavor and sweetness, and there are no mystery ingredients.
To use it, strain about ¼ cup of the liquid and add it to your sweetened beverage base, think fruit juice, herbal tea, or flavored water. Bottle the mix in airtight containers and leave them at room temperature for 2 to 3 days. During this time, the residual sugars ferment and produce natural carbonation. Chill before opening, and always open slowly, fermented drinks can build up pressure.
If you’ve ever made blue ternate tea, adding a ginger bug gives it a light fizz and gut-friendly benefits. It also works beautifully with herbal blends or fruit-forward infusions, much like those found in a blue salt trick recipe. Just be sure your base includes some sugar so the yeast has something to feed on.
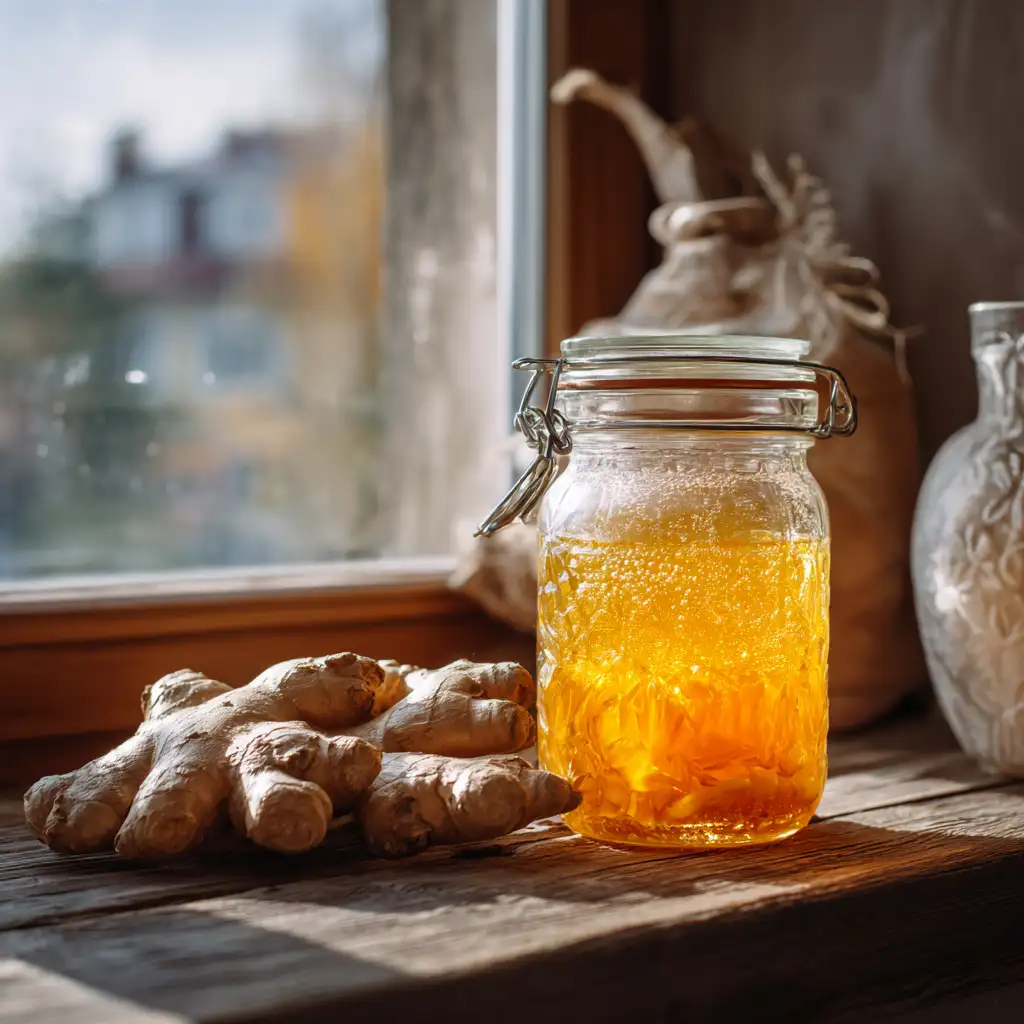
Keeping Your Ginger Bug Recipe Alive and Healthy
A ginger bug recipe is a live culture, so it needs consistent feeding to remain active and healthy. If you use it regularly, store it at room temperature and feed it daily with 1 tablespoon each of grated ginger and sugar to keep it active. Stir well and cover loosely. You’ll see bubbles and smell a sharp, yeasty scent when it’s thriving.

If you don’t plan to use it every day, you can store it in the refrigerator. If you’re not using it often, feed it once a week with the same amount: 1 tablespoon of grated ginger and 1 tablespoon of sugar. Let it sit at room temperature for a few hours after feeding so it can wake up a bit.
Here are some signs your ginger bug recipe is healthy:
- Visible bubbles rising to the surface
- A mildly sweet and fermented aroma
- Light fizzing when stirred
If it smells rotten, grows mold, or stops bubbling completely, it’s time to discard and start fresh. But don’t worry, it’s usually easy to keep going with just a few minutes of attention each day.
Some folks even rotate bugs with different flavors. Try feeding it with turmeric or citrus zest now and then to explore different taste profiles. It’s similar to the way you might tweak a salt trick recipe or boost a tonic with new spices.
Treat your ginger bug recipe like a kitchen pet. Feed it, stir it, and give it a little sunlight and it’ll reward you with the base for countless homemade drinks.
Troubleshooting and Tips for Ginger Bug Recipe Success
What to Do When Your Ginger Bug Recipe Isn’t Bubbling
Even though a ginger bug recipe is simple, it can still be a bit fussy if conditions aren’t quite right. If you’ve been feeding your mixture for several days and you’re not seeing bubbles, there are a few things to check.
Start with the water. Chlorinated tap water can stop the natural yeast and bacteria from doing their job. Switch to filtered or dechlorinated water and give your bug an extra tablespoon of ginger and sugar, it usually perks up within a day or two. Keep your jar in a warm area, ideally where the temperature stays between 70°F and 80°F.
If your ginger bug smells off, something rotten or like mold, throw it out. A well-maintained ginger bug will have a mildly sweet, yeasty, and tangy aroma. A little sediment at the bottom and foam at the top is completely normal. What’s not okay is any fuzzy growth, especially in colors like white, green, or blue.
Keeping your ginger bug active is a lot like taking care of a sourdough starter or homemade brew. If you’ve made things like a blue salt trick drink or blue ternate tea, you already understand how small changes in temperature and ingredients can affect the final result.
Creative Ways to Use a Ginger Bug Recipe in Everyday Drinks
Once your ginger bug recipe is alive and fizzing, you can use it in so many ways beyond ginger beer. Its main job is to add natural carbonation and a subtle probiotic boost to any sweetened liquid.
Here’s how to use it: strain off about ¼ cup of the liquid and add it to a sweet base like juice, herbal tea, or a mix of sugar and lemon. Bottle tightly and let it sit at room temperature for 2 to 3 days. Then chill and enjoy the fizz.
Try these ideas:
- Classic Ginger Ale: Mix water, lemon juice, sugar, and ginger bug. Bottle and ferment.
- Fruit Sodas: Add it to pineapple, mango, or apple juice with a little extra sugar.
- Fermented Lemonades: Use the bug to kick off fermentation in citrus drinks for a zesty fizz.
You can even play around with different spices or roots. Some folks add turmeric, cinnamon, or citrus zest to their bug to change the flavor over time. This is a great way to create signature blends that match the season or your taste. If you’re already experimenting with things like a salt trick recipe or herbal wellness drinks, this will feel familiar.
With just a little effort, your ginger bug recipe becomes a kitchen companion, ready whenever you want to make something naturally fizzy, flavorful, and full of life.
FAQ and Final Thoughts on Ginger Bug Recipe
What can I do with my ginger bug?
Your active ginger bug recipe gives you a live starter you can use in countless homemade drinks. The most popular use is naturally carbonated ginger beer, but it doesn’t stop there. Add a few tablespoons to sweetened herbal tea, lemonade, or fruit juice, and let it ferment for a couple of days in a sealed bottle. You’ll get a lightly fizzy, probiotic-rich drink that’s naturally fermented, no store-bought yeast or soda machine needed.
Can you drink ginger bug by itself?
Yes, you can sip a little of the liquid from your ginger bug straight from the jar. It’ll taste tangy, slightly sweet, and a bit yeasty. Some people take a spoonful as a probiotic shot. But it’s not really made for drinking in large amounts, it’s meant to be mixed with a sweet base and fermented again for flavor and fizz. That’s where the ginger bug really shines.
Do you need to wash ginger before using it?
A quick rinse is all you need, especially if you’re using organic ginger. Don’t peel or scrub too much, those wild yeasts living on the skin are what start the fermentation. Just remove visible dirt and slice or grate it with the peel on. That skin is where the natural fermentation power comes from.
Is ginger beer bug the same as a ginger bug?
Yes, they’re the same thing. A ginger beer bug is just another name for the ginger bug you’re making here. Once it’s active and bubbling, you can add it to a sugary ginger base, bottle it, and let it ferment into fizzy ginger beer over a couple of days. The key difference is that the bug is the starter, and ginger beer is the finished drink.
Final Thoughts
This ginger bug recipe might look simple, but it opens the door to homemade fermentation in the best way. It’s low-effort, low-cost, and gives you real results you can see, and taste, in just a few days. Once you’ve got your starter bubbling, you’re only a few steps away from creating your own fizzy sodas, herbal tonics, and probiotic spritzers at home.
Whether you’re after a healthier alternative to store-bought drinks or just enjoy the craft of making something from scratch, keeping a ginger bug recipe on your counter or fridge is a great way to always have a little fermentation magic within reach.
Follow us on Facebook for daily cozy meal ideas. Our Pinterest boards feature plenty of easy, delicious recipes to keep things fresh in the kitchen.