Milk popsicle recipes remind me of lazy summers growing up in Asheville, where the fridge always had a tray of frozen milk treats tucked beside leftover biscuits and homemade jam. We didn’t buy fancy popsicles; we made them from whatever milk was in the fridge whole, almond, even powdered if that’s all we had. They were creamy, lightly sweet, and full of that cold-snap comfort you want when the porch fan’s spinning and the sun won’t quit. These days, I love showing folks how simple it is to make these milk popsicles right at home. You don’t need anything complicated, just good milk, a touch of sweet, and a few minutes of prep before the freezer does its work.
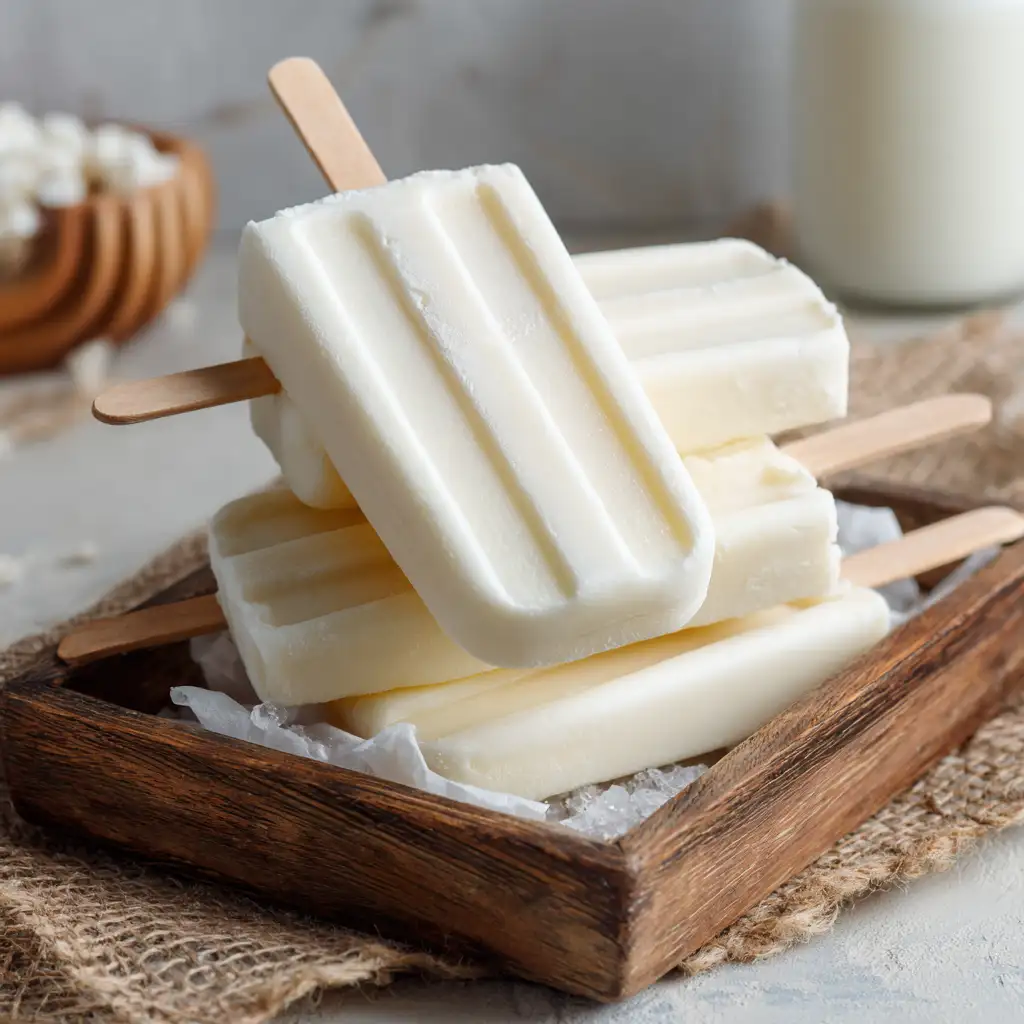
Whether you’re after a nostalgic taste or just looking to switch up your snack game, this milk popsicle recipe hits that sweet spot between easy and satisfying. It’s even a great way to use up leftover cottage cheese if you’re already making something like banana pudding or a creamy dip for your lunch spread. These popsicles bring together simplicity, comfort, and that cold, creamy bite that just makes everything better.
Table of Contents
Why Milk Popsicles Are Making a Comeback
Creamy, nostalgic, and easy to make
Milk popsicles have always had a homemade charm. Unlike fruit-only popsicles that can turn icy fast, milk-based versions stay smooth and biteable, almost like frozen custard on a stick. All you need is milk, a sweetener, and something for flavor. That could be fruit, nut butter, vanilla extract, or even a swirl of strawberry chia jam for that ripple of tang. This isn’t just a nostalgic treat, it’s a practical, adaptable recipe that fits any season.
And if you’re someone who’s already making iced matcha lavender lattes, why not freeze that milk base into a popsicle version? It’s the same ingredients, just a colder form. That’s what I love most about milk popsicles, they work with what you already have.
Budget-friendly and family-approved
The ingredients couldn’t be simpler. Milk (dairy or non-dairy), a little sweetener, and flavor add-ins. You don’t need molds either, small paper cups and popsicle sticks do the trick. Compared to store-bought versions that can sneak in preservatives and artificial flavors, these are something you’ll feel good handing over to your kids, or grabbing for yourself after a long day.
In our kitchen, they’ve become a go-to for repurposing leftovers. A splash of sweetened condensed milk leftover from a cake? Great in popsicles. Leftover banana mash from your cottage cheese banana bread? Even better. When it’s this easy to make something this good, it’s hard not to get hooked.
Simple Ingredients, Fun Variations
What you need to make a great milk popsicle
You only need a few ingredients to make a milk popsicle that’s creamy, flavorful, and won’t turn into a block of ice. Here’s the basic combo:
| Ingredient | Role in Popsicle |
|---|---|
| Milk (whole, almond, oat) | Creamy base |
| Sweetener (honey, maple syrup) | Adds flavor and texture |
| Flavor (vanilla, fruit purée, cocoa) | Brings the popsicle to life |
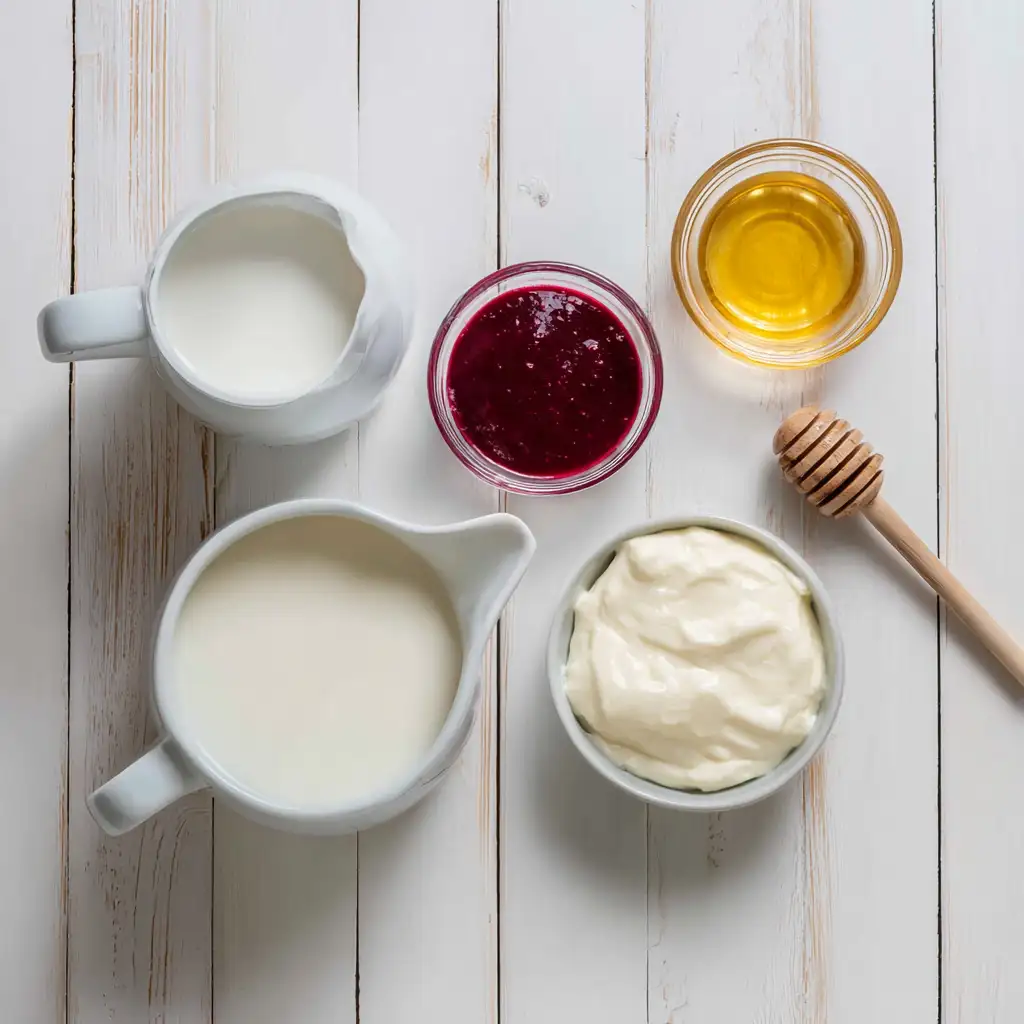
This is the base. From here, you can get creative with what’s in your kitchen. A dollop of yogurt adds tang. Coconut cream gives tropical richness. I’ve even stirred in a bit of leftover lavender matcha latte for a floral green twist.
Fun and flavorful mix-ins
Want to go beyond vanilla? Try these twists:
- Swirl in fruit purée like strawberry, mango, or blueberry
- Mix in spices like cinnamon, cardamom, or ginger
- Fold in crushed cookies or granola for texture
- Add a spoonful of peanut butter or Nutella for richness
You can also blend milk with fruits like banana or watermelon for a lighter, fruit-forward version. That watermelon limeade recipe? Puree it with a splash of milk and freeze, it turns into a bright, icy-creamy dream.
No matter which variation you try, the idea stays the same: start with milk, add flavor, and freeze. That’s it. And trust me, once you get the hang of it, you’ll always be looking for what else you can turn into a milk popsicle.
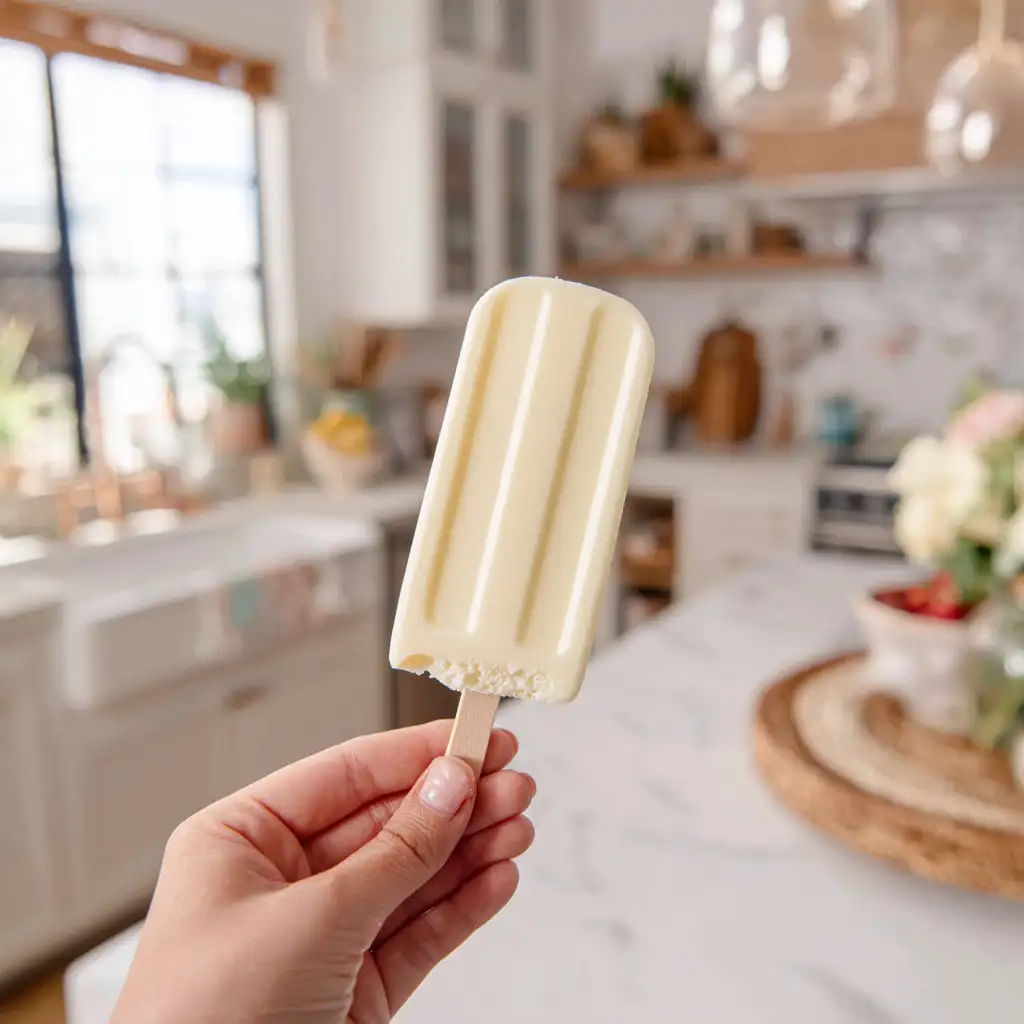
How to Make Milk Popsicles Creamy, Not Icy
The secret to smooth texture
The biggest challenge with any homemade milk popsicle? Ice crystals. No one wants to bite into a block of frozen milk. Luckily, it’s easy to avoid that gritty texture with a few small tricks.
First, always include some fat. Whole milk works best, but if you’re using non-dairy options like almond or oat, add something creamy, like coconut milk, Greek yogurt, or even a spoonful of cottage cheese. I often blend in some from my cottage cheese egg salad stash (yes, it’s that versatile) for extra smoothness.
Second, don’t skip the sweetener. Sugar, honey, or maple syrup lowers the freezing point of your mixture, which keeps it soft and scoopable. Want to try a low-sugar twist? You can still get great texture with mashed banana or a bit of condensed milk from a leftover dessert project.

Blending and freezing the right way
Blend your mix until it’s silky smooth. No chunks, no clumps. If you’re adding texture like nuts or fruit pieces, stir them in after blending. Pour the mixture into your molds (or paper cups), insert sticks, and freeze for at least 4 hours. Overnight is best.
If you want layers, like a vanilla base with a swirl of fruit, you can pour them in stages. Chill each layer in the freezer for 30 minutes before pouring the next one on top. A little extra effort, but worth it.
And if you’re already making something rich like cottage cheese banana pudding, you can pour leftovers straight into molds. That’s the kind of smart shortcut I love, nothing wasted, and something sweet waiting in the freezer.
How to Store Milk Popsicles the Right Way
Once your milk popsicles are frozen solid, transfer them out of their molds and into an airtight container or zip-top freezer bag. Be sure to separate each one with a bit of parchment paper if you’re stacking them, that way they won’t stick together. This is especially important if you’ve added swirls of jam, honey, or fruit, which can get tacky as they thaw slightly during storage.
Keep them stored at the back of your freezer where the temperature stays steady. Avoid the door it fluctuates too much and can cause ice crystals. Properly stored, your milk popsicles will keep their flavor and creamy texture for up to 2 weeks. After that, they’re still safe to eat, but you might notice a little freezer burn or flavor loss.
And if you’re freezing extra fruit-based treats to add later, go ahead and prep those in advance, too. A little freezer organization now means a whole lot of happiness later when you’re reaching for a mid-afternoon snack.
FAQs + Conclusion
Can you freeze milk into popsicles?
Absolutely. Milk is the perfect base for homemade popsicles because it freezes into a creamy texture. You can use dairy milk or non-dairy options like oat or almond. Just make sure to add a sweetener and something creamy like yogurt or coconut milk for better consistency.
How do you make popsicles creamy and not icy?
The secret is fat and sugar. Fat like full-fat milk, Greek yogurt, or even a spoonful of cottage cheese, helps with texture. Sugar lowers the freezing point, which prevents ice crystals. Blend everything well, and try adding a little honey or mashed banana like in our banana bread for extra smoothness.
What do the British call popsicles?
In the UK, they’re called “ice lollies.” The term “popsicle” is American, but the treat is just as loved across the pond. Whether you call it a popsicle, ice pop, or ice lolly, it’s the same refreshing idea, milk, sweetener, and flavor, all frozen to perfection.
How to make milk ice lollies?
Same process, different name. To make milk ice lollies, just mix milk (or plant-based milk) with a bit of sugar or honey, and flavor it with vanilla, fruit purée, or something rich like peanut butter. Pour into molds and freeze. You can even repurpose a matcha latte for a green tea version with an herbal twist.
Conclusion: Keep It Cool and Simple
Milk popsicles are the kind of recipe that brings joy without effort. They’re easy, flexible, and use ingredients you already have. Whether you’re working with dairy or non-dairy, sweet or fruity, creamy or tangy, there’s a version waiting in your kitchen right now. Keep a stash in the freezer, and you’ll always have a snack that feels special, even on the most ordinary day.
Once you start making these, you’ll see it’s not about perfection, it’s about comfort. Just like those childhood summers with sticky fingers and a bowl of melting popsicle sticks on the porch table.
Follow us on Facebook for daily cozy meal ideas. Our Pinterest boards feature plenty of easy, delicious recipes to keep things fresh in the kitchen.

Milk Popsicle Recipe That’s Creamy, Simple, and Family-Friendly
Milk popsicles that are creamy, not icy. Simple ingredients and endless variations make this a summer staple snack.
- Total Time: 4 hours
- Yield: 6 popsicles 1x
Ingredients
2 cups whole milk or dairy-free milk
2 tbsp honey or maple syrup
1 tsp vanilla extract (or flavor of choice)
Optional: 1/4 cup yogurt or coconut cream for extra creaminess
Optional: 1/4 cup fruit purée or jam
Instructions
1. Blend milk, sweetener, vanilla, and optional yogurt until smooth.
2. Add flavor mix-ins or fruit purée and blend again, if using.
3. Pour mixture into popsicle molds or paper cups.

4. Insert sticks and freeze for at least 4 hours, or overnight.
5. To release, run molds under warm water for a few seconds.

Notes
Use parchment paper to separate popsicles during storage.
Store at the back of the freezer for best texture.
Experiment with leftover matcha, jam, or cottage cheese.
- Prep Time: 5 minutes
- Cook Time: 0 minutes
- Category: Frozen Treats
- Method: Freeze
- Cuisine: American
- Diet: Vegetarian
Nutrition
- Serving Size: 1 popsicle
- Calories: 110
- Sugar: 8g
- Sodium: 35mg
- Fat: 4g
- Saturated Fat: 2g
- Unsaturated Fat: 2g
- Trans Fat: 0g
- Carbohydrates: 12g
- Fiber: 0g
- Protein: 3g
- Cholesterol: 10mg